


23 Mar

Warning: Do not touch the bulb with bare hand. The bulb becomes very hot during operation or just after use.
- The set of wiring kit is only applying to the fog light sets which packed together with the wiring kit.
- To attach different fog lights and different vehicle, the fog light wiring kit will be different.
- Before starting installation, you are expected to carefully read the following instructions and the manual.
- Right tools are required to ensure proper execution of the work. Such as wrench, nippers, flat-tip screwdriver, phillips screwdriver, clip remover, shop towel, cardboard or blanket and the so on
- Bind all harnesses together so that they do not move around loosely, otherwise the harnesses may break or short circuit, and accidents, electric shocks or fire may occur.
- When connecting the harnesses or plugs, insert the connectors firmly until they lock securely into place.
- Disconnect the negative terminal of the battery before installation. Make sure that lamps, air conditioner and other devices are switched off. NOTE: The memories of the radio presets, clocks, etc. can be erased by disconnecting the battery cable. Write down these presets before disconnecting the battery cable.
- Then open the hood and remove the front bumper if necessary, then install fog lights to the proper positions.
- The fog lights operate only in the low-beam position. Adjust the light aiming according to local laws and regulations.
Watch General Installation Video
Other instructions:
- Turn the steering wheel clockwise or counterclockwise. Left-hand-drive vehicle turn clockwise, right-hand-drive vehicle turn counterclockwise. Then remove the front inner fender of the driver side.
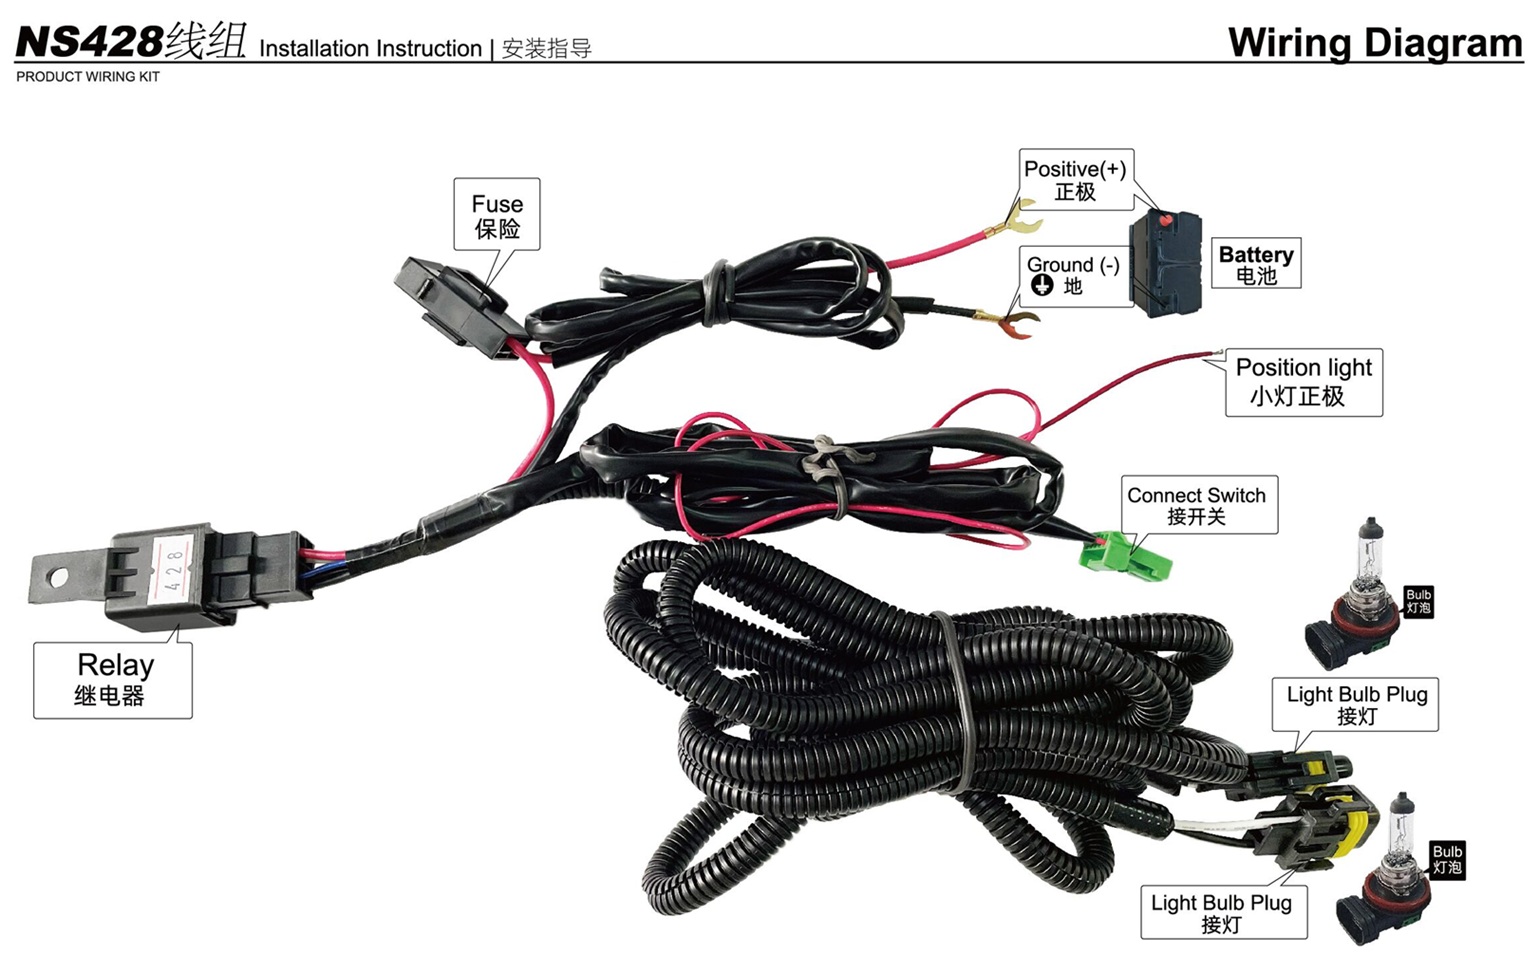
- Route the main wiring harness (A) through the engine room to the lamp and connect with bulb (B). Attach relay to relay box (C) then attach black wire (Negative ) of main wiring harness to frame metal parts to create a ground circuit (D). Attach red wire (Positive ) of main wiring harness to Positive of the battery (E).
- Route the main wiring harness (A-1) through the cut grommet (F) and connect with main switch wiring harness (G). NOTE: Some vehicle models may be pre-wired, then find out the correct circuit and plug it together.
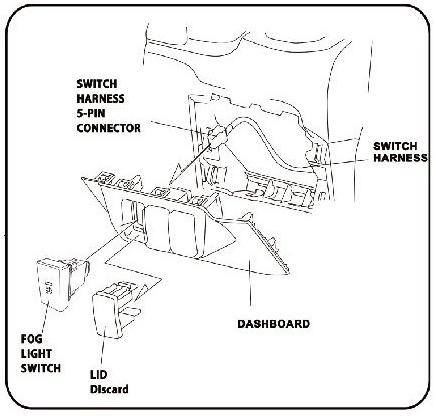
- Find an appropriate location to mount the switch. It's usually on the dashboard but some vehicle's switch position is near the hand brake.
- Remove the driver's dashboard lower cover if necessary, then find the power line of the parking lamp (Small lamp) (H-1) and connect with the red wire (Positive ) of the main switch harness (H). Attach the black wire (Negative ) of main switch wiring harness to metal frame to create a ground circuit (I). Then connect the switch (J) with switch connector (K) and put the switch to the right position.
- Push the fog light switch to the "ON" position. (Indicator in switch light up.)
- If the fog lights don't turn on, check the fuse (Most vehicle's fuse box is located in driver's dashboard lower cover) and all wire connectors, including the ground cable.
- The fog lights lenses may cloud when the outside temperature is cold. It is normal and would go away in warm weather.
- Stains or greasy substances will shorten the service life of the bulb.

Leave a Comment